

Hi 大家~今天瓦特歐要來介紹,如何為自己python寫的GUI軟體,鑲入圖片!!!
我們就以上次的day8 GUI製作,當作範本繼續介紹下去~沒看過上篇的可以參考
下方連結:
[TIL#8] Python 自學 day8 GUI製作- 使用Tkinter Grid管理器
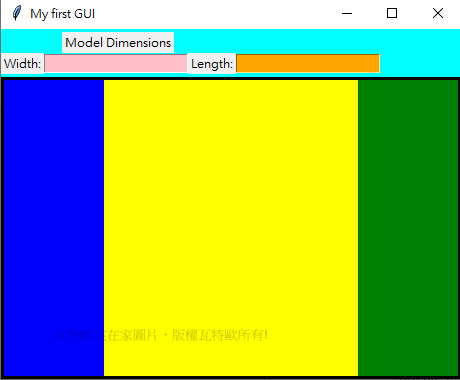
附上day8的GUI視窗圖:
將圖片放一個資料夾,使用相對路徑,將圖片import至GUI視窗中:
基礎的code範例,將以下方smile 當作圖片:

#import PIL library
from PIL import Image,ImageTk

#load image form image file path
image=Image.open(".\smile.png")#load loacl image
photo = ImageTk.PhotoImage(image)
label = Label(center, image = photo)#Create label toPlace the picture
label.grid(row=0, column=1)# setting label position
解說:
將Smile 圖片放至到label中,再將label放在center的第0 row and 第1 col的位置
完整範例程式碼:
from tkinter import *
import os
from PIL import Image,ImageTk
root = Tk()
root.title('My first GUI')
root.geometry('{}x{}'.format(460, 350))

# create all of the main containers
top_frame = Frame(root, bg='cyan', width=450, height=50, pady=3)
center = Frame(root, bg='gray2', width=50, height=40, padx=3, pady=3)


# layout all of the main containers
root.grid_rowconfigure(1, weight=2)
root.grid_columnconfigure(0, weight=1)

top_frame.grid(row=0, sticky="ew")
center.grid(row=1, sticky="nsew")


# create the widgets for the top frame
model_label = Label(top_frame, text='Model Dimensions')
width_label = Label(top_frame, text='Width:')
length_label = Label(top_frame, text='Length:')
entry_W = Entry(top_frame, background="pink")
entry_L = Entry(top_frame, background="orange")

# layout the widgets in the top frame
model_label.grid(row=0, columnspan=3)
width_label.grid(row=1, column=0)
length_label.grid(row=1, column=2)
entry_W.grid(row=1, column=1)
entry_L.grid(row=1, column=3)

# create the center widgets
center.grid_rowconfigure(0, weight=1)
center.grid_columnconfigure(1, weight=1)

ctr_left = Frame(center, bg='blue', width=100, height=190)
ctr_mid = Frame(center, bg='yellow', width=250, height=190, padx=3, pady=3)
ctr_right = Frame(center, bg='green', width=100, height=190, padx=3, pady=3)

ctr_left.grid(row=0, column=0, sticky="ns")
ctr_mid.grid(row=0, column=1, sticky="nsew")
ctr_right.grid(row=0, column=2, sticky="ns")

#load image form image file path
image=Image.open(".\smile.png")#load loacl image
photo = ImageTk.PhotoImage(image)
label = Label(center, image = photo)#Create label toPlace the picture
label.grid(row=0, column=1)# setting label position

root.mainloop()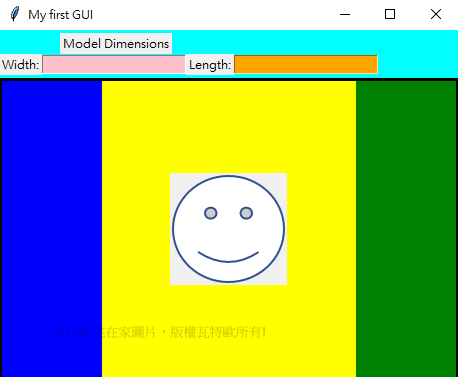
瓦特歐Python介紹系列:
[TIL#1] Python 自學 day1 Anaconda
[TIL#2] Python 自學 day2 變數
[TIL#3] Python 自學 day3 流程控制
[TIL#4] Python 自學 day4 製作執行檔
[TIL#5] Python 自學 day5 執行檔更換icon
[TIL#6] Python 自學 day6 PIL浮水印、圖片大小變更
[TIL#7] Python 自學 day7 大量圖片Resize 處理 懶人包
[TIL#8] Python 自學 day8 GUI製作- 使用Tkinter Grid管理器
[TIL#9] Python 自學 day9 GUI製作 放入圖片 grid 版本
[TIL#10] Python 自學 day10 創造圖片的拼貼
[TIL#11] Python 自學 day11 matplotlib 統計圖、長條圖、圓餅圖、散佈圖